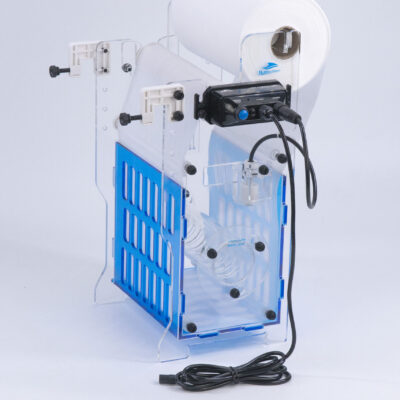
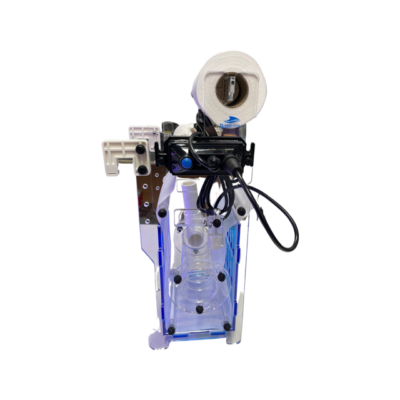
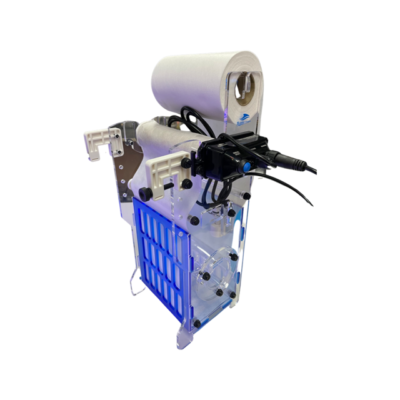
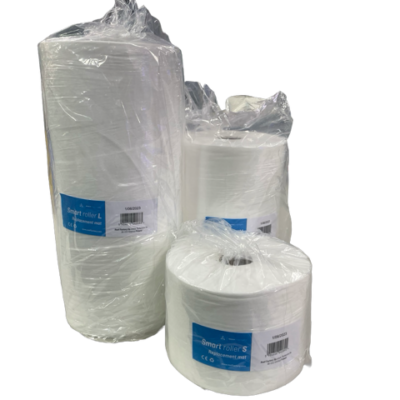
SIMPLE FLEECE REPLACEMENT
When the clean roll is empty, the smart controller will generate an alarm.
At this time the end of the fleece usually stops advancing at a position level with the float switch on the clean side of the Clarisea unit, with the water overflowing the end of the roll and between the filter plate and the splash guard.
To replace the roll
- Cut the dirty fleece along its width at the top of the dirty roll holder. This allows removal of the motor assembly with the remainder of the dirty fleece. Remove the motor assembly. DO NOT REMOVE THE CUT PIECE OF USED FLEECE FROM THE CLARISEA AT THIS TIME.
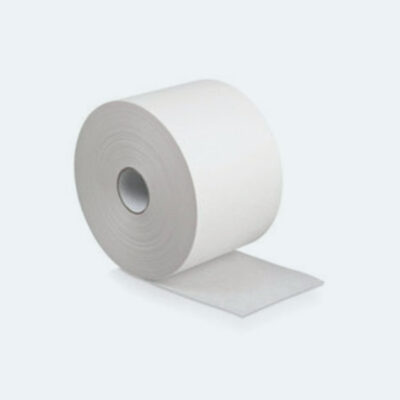
- Put the new clean roll onto the clean roll holder being sure fleece unwinds clockwise.
- Fully open the bypass flap to reduce water pressure in the Clarisea unit.
- Grab and pull through the short end of the dirty fleece, (end closest to clean roll, NOT end closet to motor assembly), back toward the clean roll slightly to allow easy access to the end of the dirty fleece.
- Overlay the end of the new fleece over the end of the dirty fleece by about 2cm and staple together in 3-4 places to attach the 2 rolls together (this is only temporary).
- Carefully pull on the cut end of the used fleece closest to the motor assembly – this will now draw the new fleece through the Clarisea unit.
- Keep drawing the new fleece through in this way until it easy to grab hold of the new fleece at the side closet to the motor assembly.
- Cut the old fleece off just below the level of the staples.
- Re attach the motor – the fleece can now be threaded onto the motor assembly – cut a square approx. 20mm x 20mm out of the rear corner of the fleece and place the free end of the fleece from left clockwise around the motor assembly – clip the grey corrugated sleeve over the end of the fleece – this will retain the fleece.
- Close the bypass flap.
- Manually advance the motor assembly by pressing the manual advance button until 2 – 3 turns of fleece are wound onto the motor assembly whilst checking for smooth operation and correct alignment of fleece – be sure to check the alignment of the motor assembly so that fleece rolls onto the assembly evenly.
USED FLEECE REMOVAL
- Cut the roll of dirty fleece along its width to allow removal of the motor assembly with the roll of dirty fleece.
- Loosen the screw at the rear of the motor assembly and carefully slide the motor assembly and dirty fleece together upwards in the slot in the rear panel to remove.
- With the motor assembly removed, whilst holding the used fleece in one hand, and the motor assembly mounting screw in the other in the other, pull the motor assembly and fleece apart – the used fleece should slide off the front of the motor assembly with the corrugated sleave still inside.
- Squeeze the corrugated grey sleeve and remove from the used roll then discard the used fleece.
- Replace the corrugated sleeve back onto the motor assembly and re attach the motor assembly to the Clarisea unit.
TROUBLESHOOTING GUIDE
1 – POSSIBLE ROLL JAM/MOTOR FAILURE (FLOAT HELD IN UP POSITION FOR MORE THAN 5 SECONDS)
- Red alarm LED will flash.
- Audible alarm will sound for 2 seconds every 5 seconds.
- Automatic advance of fleece disabled.
Likely causes:
A – Fleece roll jammed – to check if roll jammed – use the manual motor advance button to see if roll can be advanced. If roll cannot be advanced – check there is no restriction on clean roll – try to pull the fleece through manually by hand a small way and then try to wind onto the dirty roll using the motor advance button.
- Note that the clean roll is designed to rotate on the 2 sponge spacers. If the ends of the cardboard centre tube are damaged, squashed or swollen with water then this may create friction and a resistance to rotation and may be the first place to look.
- Try manually pulling through some of the fleece to ensure that the fleece is not trapped on the bottom rollers due to a large lump of gravel having been drawn through.
B – Float switch stuck in the up position – visually check if float switch float is the same level as water in Clarisea unit or above water level – if above the water level in Clarisea, gently try to move the float switch up and down several times by hand.
C – Motor assembly fault – as above in A. If after pulling some fleece through towards the dirty roll, the motor assembly still cannot wind, the motor assembly will need to be removed to be inspected.
- Using a sharp knife or scissors, cut the dirty fleece along its width as it meets the dirty roll (leave the remaining fleece in the Clarisea to allow it to be re attached to motor assembly).
- After removing the motor assembly, remove the dirty fleece by holding the rear motor mounting screw in one hand and grabbing hold of the fleece and slide the fleece away from the rear of the motor – the used fleece should slip off with the plastic corrugated sleeve still inside the fleece roll – remove this corrugated sleeve and re install on the motor and discard the used fleece.
- Check operation of the motor with the manual advance button – can the motor be heard turning? – if not, the motor may be damaged and require replacement.
- If the motor can be heard turning, remove the motor outer sleeve by removing the front screw in the centre of the motor assembly and remove the motor outer sleeve. Check operation of the motor with the manual advance button – is the “+” shaped drive shaft turning? If not, can you see if the motor shaft is turning (the “+” shaped driveshaft is slipping on motor shaft)?
2 – POSSIBLE FLEECE EMPTY (FLOAT NOT TRIGGERED WITHIN THE 8 HOUR TIME LIMIT)
- Blue/Red LED both flashing, audible alarm will sound for 1 second every 2 seconds.
- Automatic advance of fleece disabled.
Likely causes:
A – Is the clean roll of fleece empty – the water in the Clarisea is spilling over the top of the clean end of the fleece? If so, replace the fleece roll.
B – Is the bypass flap opened, allowing too much water to escape?
C – Is the unit assembled correctly (particularly on new installations) with the fleece threaded correctly without water bypassing the sides of the fleece?
3 – POSSIBLE INITIAL INSTALLATION ERROR (FLOAT NOT TRIGGERED WITHIN 48 HOURS)
- Red LED will flash at 10 second intervals (audible alarm will sound with each flash).
- Automatic advance of fleece disabled.
Likely causes:
A – Is the bypass flap opened, allowing water to escape too much?
B – Is the unit assembled correctly (particularly on new installations) with the fleece threaded correctly?
C – Insufficient flow through the Clarisea unit – increase flow through Clarisea.
4 – DIRTY ROLL DOES NOT RUN SQUARE ON THE DIRTY ROLL HOLDER
Likely causes:
A – The dirty roll holder has not been installed level causing the fleece to run over and build up on one side.
The back plate of the Clarisea body has a guide line marked where the dirty roll is designed to fit. This line should go straight through the centre of the head of the securing bolt.
- Is the roll is moving towards the BACK of the dirty roller? This means that the back of the roll is set too LOW relative to the front guide plate. Unscrew and RAISE the motor position slightly on the back plate.
- Is the roll is moving towards the FRONT of the dirty roller? This means that the back of the roll is set too HIGH relative to the front guide plate. Unscrew and LOWER the motor position slightly on the back plate.
TIP: The motor can be inserted into slot on the back plate with the alignment peg upwards or downwards. Sometimes reversing this position will help to level the dirty roller.